

Cable Management for a Clean Audio Setup: The 2026 Audiophile Guide
What if the tangled nest of wires behind your amplifier isn't just an eyesore, but a silent thief stealing the clarity from your most cherished recordings? It's a frustration many of us share, where the "cable kraken" creates visual noise that disrupts the peace of a dedicated listening sanctuary. You've curated your components with reverence, yet mastering how to organize audio equipment remains the final hurdle in achieving true sensory perfection.
It's time to move beyond mere tidiness and embrace "acoustic hygiene" as a vital part of the high-fidelity experience. I've spent years refining the balance between technical performance and aesthetic grace, and I promise that a pristine setup is within your reach. This guide explores how to eliminate audible hum and signal interference by applying the latest FprEN 50065-1:2026 electromagnetic standards alongside modern magnetic management trends. We'll look at how an open-architecture foundation, like the solid wood Minimal Myro HiFi Rack, allows for effortless maintenance and superior thermal control. You'll discover how to transform your gear into a gallery-ready display that preserves the integrity of every note while making future upgrades a simple, tactile pleasure.
Key Takeaways
Learn the "Cross at 90 Degrees" rule to eliminate signal interference between power and sensitive audio lines.
Discover how to organize audio equipment by mapping signal paths to complement open-architecture furniture like the Myro Minimal.
Replace permanent ties with reusable Velcro and braided sleeving for a flexible setup that's easy to maintain and upgrade.
Elevate your room's aesthetic by treating your solid hardwood rack as a vital instrument of "acoustic hygiene."
Improve your system's signal-to-noise ratio by separating sensitive cables from noisy power sources for a purer sound.
Why Cable Management is Essential for High-Fidelity Performance
In the world of high-fidelity sound, we don't just tidy up. We practice cable dressing. It's an art form that treats every conductor with the same respect as the vacuum tubes or solid-state circuitry they connect. Understanding how to organize audio equipment is about more than just hiding a mess; it's about honoring the signal path. When wires are left in a chaotic heap, they become a source of visual anxiety that detracts from the quiet focus required for deep listening. A structured approach follows fundamental cable management principles to ensure that form always follows function.
This level of care mirrors the artisanal construction found in our Reference Myro HiFi Rack, where every joint and surface is designed for a specific purpose. Just as a master luthier selects wood for its resonance, an audiophile organizes cables to preserve the purity of the electrical signal. It's a commitment to excellence that extends from the internal components to the very wires that bridge them. When your setup is orderly, the equipment is allowed to perform at its peak without the invisible burden of electromagnetic clutter.
Beyond the visual, there's a mechanical reality to consider. High-end cables are often heavy and stiff, putting immense strain on delicate RCA and XLR connectors. Without proper support, "cable sag" can lead to micro-fractures in solder joints or loose chassis inputs over time. By organizing your runs, you prevent this mechanical stress and ensure your investment lasts a lifetime. It's a simple act of stewardship for the instruments that bring music into your home.
The Concept of Acoustic Hygiene
Acoustic hygiene is the deliberate arrangement of conductors to minimize interference. It's the final stage of room treatment. Just as you manage reflections with acoustic panels, you must manage electromagnetic shadows with careful placement. Reducing visual noise lowers your psychological noise floor. When the room looks calm, your brain can focus more deeply on the micro-dynamics of a recording. It creates a personal sanctuary where nothing stands between you and the performance.
Safety and Accessibility
Heat is the silent enemy of electronics. Bundled, tangled cables trap stagnant air and prevent the natural convection that high-performance amplifiers require. Learning how to organize audio equipment ensures that thermal management remains efficient and airflow is unobstructed. Additionally, an organized setup makes "the swap" a joy rather than a chore. If you've ever struggled to pull a single interconnect from a tangled nest during an upgrade, you know that accessibility is the key to a sustainable hobby. Organized cables facilitate easier component switching and long-term maintenance.
Managing Signal Interference: The Science of Cable Separation
While many mainstream guides suggest bundling all your wires together for a "clean" look, this is a technical mistake that can degrade your sound. True high-fidelity performance requires more than just hiding the mess; it requires an understanding of how electromagnetic fields interact. When you learn how to organize audio equipment, the primary goal is to mitigate Electromagnetic Interference (EMI) and Radio Frequency Interference (RFI). These invisible forces act as a veil over your music, raising the noise floor and masking the fine details of a recording. The impact of electrical interference in audio systems is well-documented, and the solution lies in strategic physical separation.
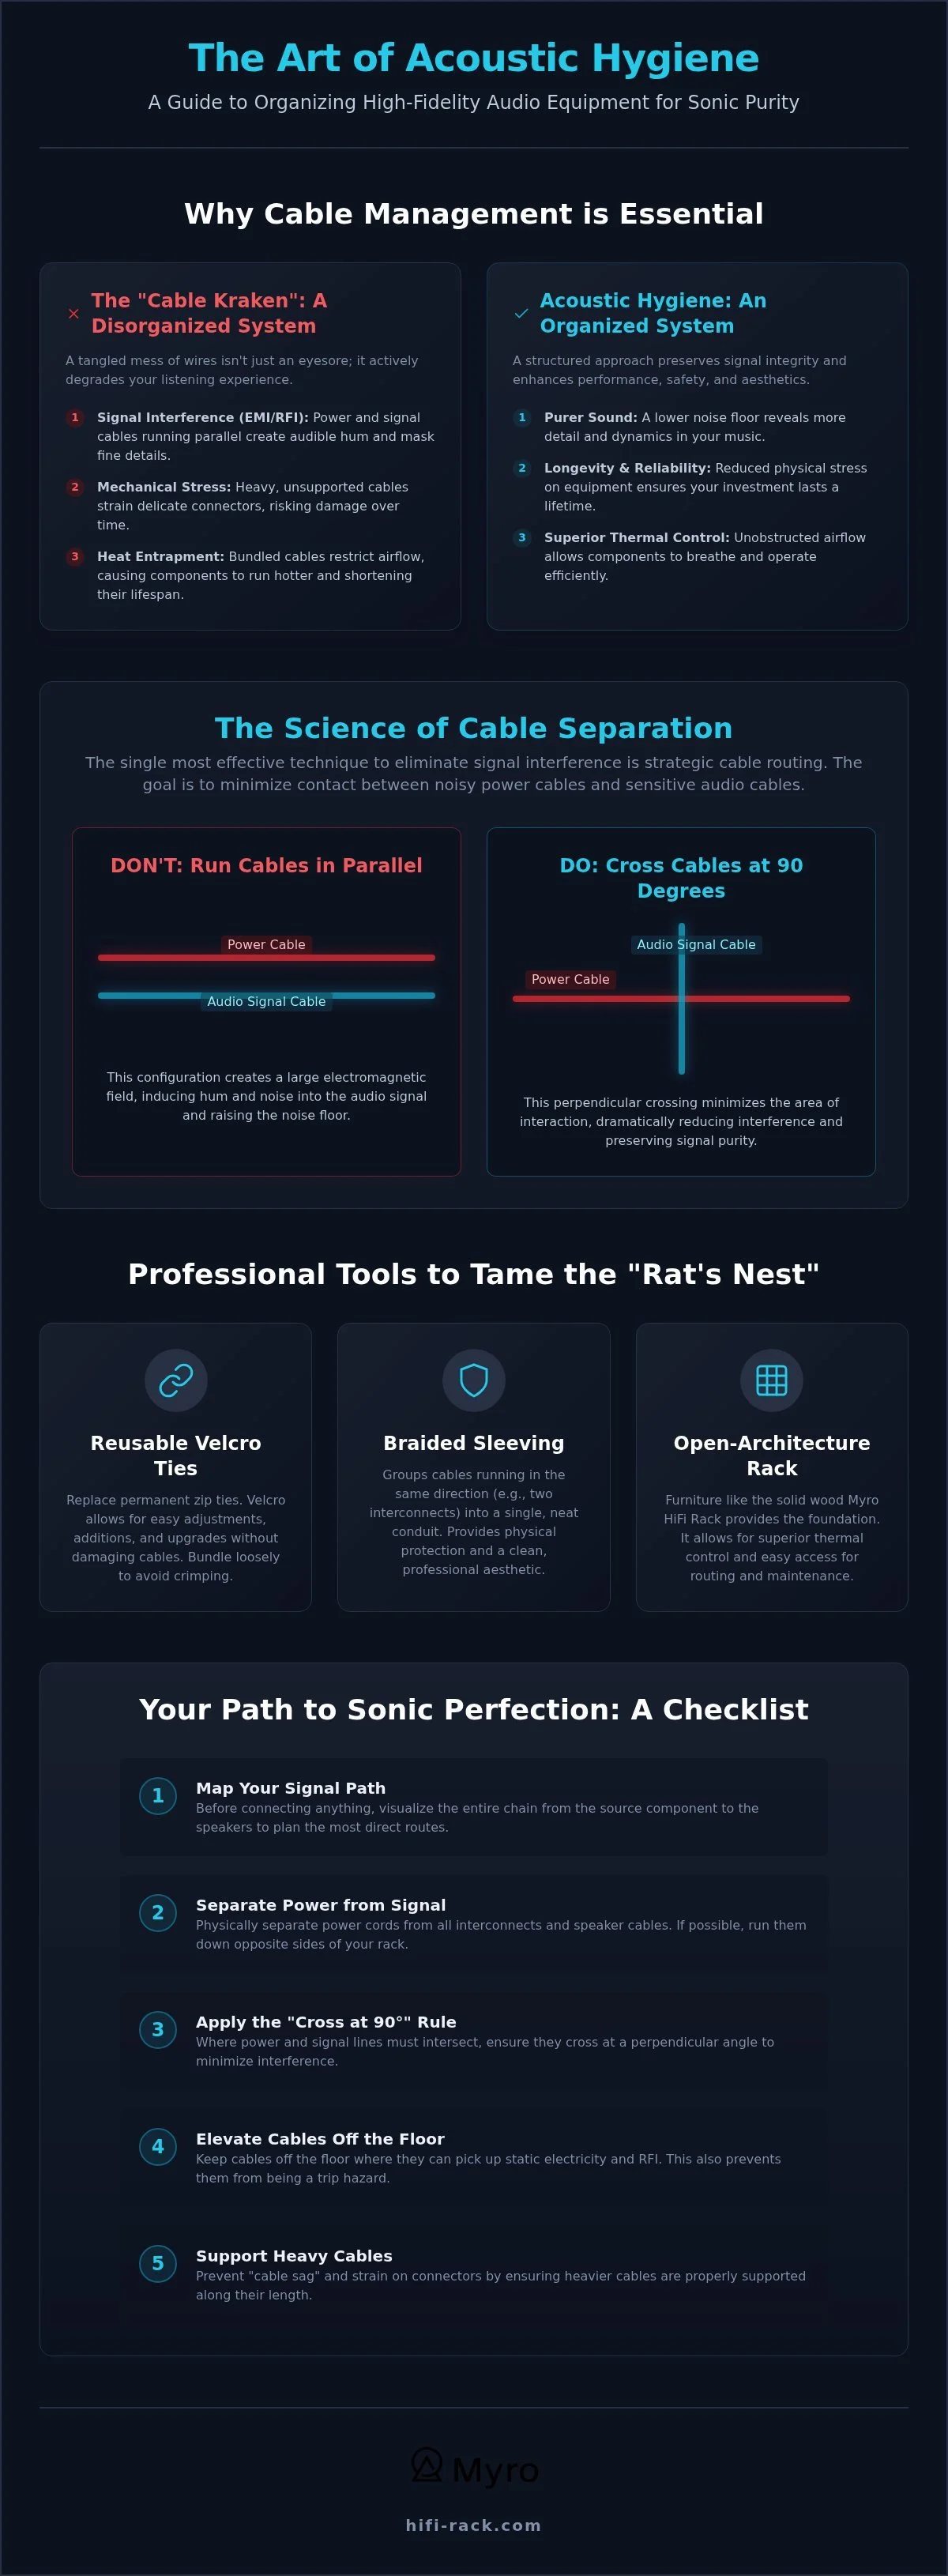
The most effective tool in your arsenal is the "Cross at 90 Degrees" rule. When power cables and signal interconnects must intersect, they should never run parallel to one another. Instead, they should cross at a perpendicular angle. This orientation minimizes the magnetic coupling between the two conductors, preventing the 50/60Hz alternating current of your power lines from "bleeding" into the delicate low-voltage signal of your interconnects. Even high-end cables with advanced shielding aren't a cure-all. Shielding can only do so much against high-current magnetic fields, making physical distance and orientation your most reliable allies in the pursuit of sonic purity.
Power vs. Signal: Keeping the Peace
Distance is your best friend. I recommend a "split-rack" philosophy where power cords are routed down one side of your furniture and signal cables down the other. This is particularly vital for sensitive phono stages, where the signal from a turntable is so minuscule that even a small amount of induced hum can become audible. By keeping these runs separate, you preserve the blackness of the background and the integrity of the soundstage. A clean canvas like the Minimal Myro HiFi Rack provides the open architecture needed to execute these routing paths without compromise.
Crosstalk and Signal Integrity
Crosstalk occurs when signals from one cable "leak" into an adjacent one through induction. This is a common issue with unshielded speaker cables or budget interconnects. To prevent this, avoid tight bundles and use cable risers to decouple wires from the floor and each other. Decoupling isn't just about electrical interference; it's also about mechanical isolation. You can read more about how materials influence this in our guide on The Science of Vibration Damping in Solid Hardwood. By lifting cables and maintaining space, you ensure that every component remains an island of pure performance, free from the electronic chatter of its neighbors.
Strategic Routing for Open-Architecture Audio Furniture
Open architecture is the purist's choice for a high-end system. Racks like the Myro Minimal offer superior thermal management and a lighter visual footprint, but they present a unique challenge: there is no backboard to hide behind. When you're considering how to organize audio equipment in such a transparent environment, you must be more deliberate. The goal isn't just to tuck wires away, but to integrate them into the structure's silhouette so they disappear into the shadows of the solid wood frame.
I always begin by mapping the signal path before a single component touches the shelf. This "pre-flight" check involves visualizing the flow from the source to the pre-amp, then down to the power amplification. By grouping cables into tiers, you prevent the chaotic "spider web" effect that occurs when wires are connected haphazardly. I recommend using gravity to your advantage; let the cables drape in natural, relaxed curves. A gentle arc is always preferable to a forced, tight bend, as it preserves the physical integrity of the internal conductors and prevents the mechanical stress on chassis inputs we discussed previously.
The Vertical Anchor Method
The rear legs of your rack are your most effective visual anchors. By running cables vertically along the back of these pillars, you can effectively shield them from view from the primary listening position. When securing these runs, I exclusively use non-marring fasteners like soft Velcro wraps or silicone ties. Never use plastic zip ties; they are too permanent and can mar the artisanal finish of solid hardwood. This method maintains a minimalist silhouette while ensuring that every component remains easily accessible for future upgrades or cleaning.
Managing Cable Slack
Dealing with over-long interconnects requires a "loop and tuck" technique. Instead of coiling the excess, I let it hang in a wide, gentle loop behind the component. I've learned through experience that you should never tightly coil a power cable. Doing so creates an induction coil effect, which can introduce unwanted noise or even heat buildup. For a truly "gallery-ready" look, organize the floor space beneath the bottom shelf so that no wires touch the ground. This creates a floating aesthetic that emphasizes the clean lines of your furniture and makes the entire system feel lighter and more intentional.
By following these steps, you turn the necessity of wiring into a disciplined extension of your system's design. It's a final touch of craftsmanship that ensures your focus remains entirely on the music. If you're looking to start with the right foundation, exploring a dedicated solid wood hifi rack is the first step toward achieving this level of organizational harmony.
Professional Tools to Tame the Audiophile "Rat’s Nest"
I've often seen systems where the gear is world-class, but the wiring is held together by cheap, hardware-store zip ties. It's a jarring contrast that ignores the physical needs of high-end conductors. When you're refining how to organize audio equipment, your choice of fasteners is a statement of intent. I always reach for Velcro wraps over plastic zip ties. Zip ties are far too permanent and, more importantly, they can over-compress a cable's delicate dielectric material. This pressure can subtly alter the electrical properties of the cable, whereas Velcro offers a soft, adjustable grip that respects the cable's internal construction.
For long umbilical runs between a separate power supply and a pre-amplifier, braided expandable sleeving is indispensable. It groups multiple conductors into a single, elegant trunk, which significantly reduces visual clutter while providing an extra layer of physical protection. I also recommend a disciplined labeling system. Tagging both ends of every cable might seem tedious during the initial setup, but your future self will be grateful during the next move or component upgrade. It turns a potential diagnostic nightmare into a systematic, stress-free process.
To provide your equipment with the foundation it deserves, explore our collection of solid hardwood racks and stands designed for the discerning listener.
Fasteners that Respect the Material
Soft-touch silicone ties are an excellent alternative for delicate cable jackets, providing enough friction to stay in place without biting into the material. It's crucial to avoid any adhesive-backed clips on solid wood surfaces. These adhesives can fail over time or, worse, leave permanent chemical marks and strip away the artisanal finish we work so hard to preserve. For heavy, high-end power cords that refuse to stay in place, I utilize weighted cable bases. these provide the necessary anchor point without requiring any permanent or damaging attachment to your furniture.
The Role of Cable Risers
Cable risers often spark debate in the community, but the underlying theory is based on sound engineering. They decouple wires from floor-borne vibrations and minimize static interaction with synthetic carpets, which can theoretically introduce minute amounts of noise into the signal. Whether you choose boutique ceramic risers or a simple DIY wooden block, what matters is the consistent elevation and separation of the runs. These risers complement the isolation provided by high-quality Speaker Stands, ensuring that every part of the signal path is protected from external mechanical noise. When you learn how to organize audio equipment with this level of detail, you aren't just cleaning up; you're optimizing the very environment in which your music lives.
Designing for Harmony: The Intersection of Sound and Visual Order
I've always believed that a true listening room is a sanctuary. In this space, every element should contribute to a sense of calm and focused intention. Your audio rack is far more than a mere gear holder; it is a central piece of furniture that anchors the room's energy and reflects your commitment to the craft. When I designed the Classic Myro HiFi Rack, the goal was to balance the physical mass required for vibration damping with a clean, understated profile. This balance is essential because a cluttered environment creates a cluttered mind, which ultimately distracts from the emotional resonance of the music.
The emotional reward of a "gallery-ready" setup is profound. There is a specific type of satisfaction that comes from knowing the hidden world behind your components is as orderly as the front panels. While some modern trends suggest using bright lights to mask a mess, the sophisticated audiophile aesthetic relies on the natural beauty of raw materials. By mastering how to organize audio equipment, you align the technical excellence of your system with the organic warmth of your living space. It turns a collection of electronics into a cohesive instrument of sensory perfection.
Beyond the audio rack, creating a truly harmonious environment often involves high-quality seating and workspace layout; you can discover Smart Buy Office Furniture for preowned commercial solutions and ergonomic chairs that help maintain a professional, clutter-free sanctuary.
The Master Craftsman’s Approach
I treat the back of the rack with the same reverence as the front. Solid wood provides a much more organic and forgiving visual backdrop than the cold, reflective surfaces of metal or glass. This natural grain helps cables blend into the shadows rather than standing out as eyesores. I encourage you to view cable routing as a meditative ritual of the hobby. It is a time to slow down, appreciate the tactile quality of your conductors, and ensure every connection is seated with absolute precision. This level of care is what separates a casual listener from a true connoisseur of sound.
Your Next Step in Sensory Perfection
As you conclude this journey into acoustic hygiene, I invite you to evaluate your current foundation. Is your rack helping or hindering your efforts to maintain a clean setup? A modular approach to routing is only possible when your furniture provides the right anchors and open access. If you find yourself fighting against your furniture to keep wires tidy, it may be time for an upgrade. To achieve a truly "Reference" level setup, use this final checklist:
Verify Separation: Ensure power and signal lines cross only at 90-degree angles.
Check Tension: Confirm that no cable is under mechanical strain or pulling on a chassis input.
Audit Fasteners: Replace any remaining plastic zip ties with soft, reusable Velcro wraps.
Assess Elevation: Use risers or vertical anchors to keep cables from resting in a tangled heap on the floor.
When you are ready to provide your system with the artisanal foundation it deserves, explore the HiFi Rack Shop to find the perfect solid wood rack for your journey toward sonic and visual harmony. Learning how to organize audio equipment is the final step in honoring the music you love.
The Final Note on Acoustic Harmony
Mastering how to organize audio equipment is more than a weekend project; it's the ultimate act of respect for the music you love. By applying the "Cross at 90 Degrees" rule and utilizing the natural anchors of your furniture, you've moved beyond simple tidiness. You've embraced acoustic hygiene to ensure your signal path remains as pure as the artist intended. This disciplined approach eliminates the invisible veil of interference, allowing the micro-dynamics of your favorite recordings to shine through with newfound clarity.
I believe that high-fidelity sound deserves to live on a foundation built with integrity. Our family-owned woodworking shop produces artisanal racks designed specifically for high-end acoustic isolation. We use only premium solid hardwood, completely avoiding the sonic and aesthetic compromises of MDF or veneers. This commitment to raw, high-quality materials ensures your setup isn't just organized, but transformed into a permanent sanctuary for sound. It's a union of performance and aesthetics that lasts a lifetime.
Elevate your setup with a handcrafted solid wood HiFi rack and discover the profound difference that visual and acoustic order can bring to your listening experience. It's time to let the music speak for itself.
Frequently Asked Questions
Does cable management actually improve the sound of my HiFi system?
Yes, cable management improves sound by reducing the noise floor and preventing signal degradation from electromagnetic interference. When you understand how to organize audio equipment with precision, you minimize the "hiss" or "fog" that masks subtle musical details. Proper separation ensures that delicate low-level signals remain pure and unaffected by the high-current magnetic fields generated by power cords.
Should I bundle my power cables and speaker wires together to keep them neat?
You should never bundle power cables and speaker wires together because the high current in power lines can induce noise into your audio signal. This phenomenon, known as inductive coupling, leads to audible distortion and a loss of clarity. Maintain as much distance as possible between these two types of conductors, and only allow them to cross at perpendicular angles to minimize interference.
What is the best way to hide cables on an open-back HiFi rack?
The best way to hide cables on an open-back rack is to use the rear vertical pillars as anchors for your wire runs. By securing cables along the back of the solid wood legs, you shield them from the listener's line of sight without sacrificing the rack's minimalist silhouette. This method preserves the beauty of a piece like the Myro Minimal while keeping the setup functional and accessible.
Are cable risers a "snake oil" product or do they serve a purpose?
Cable risers serve a legitimate purpose by decoupling wires from floor-borne vibrations and reducing static interaction with synthetic flooring. While the audible difference varies based on your environment, they are an essential part of a comprehensive vibration-control strategy. They complement the isolation provided by your furniture and speaker stands, ensuring that even the cables are protected from mechanical noise.
How do I prevent "hum" caused by my cables?
You can prevent hum by ensuring proper grounding and maintaining physical distance between power sources and sensitive signal paths. Most hum is caused by 50/60Hz alternating current "leaking" into interconnects or phono stages. Applying the "Cross at 90 Degrees" rule is a fundamental step in how to organize audio equipment to eliminate these ground loops and induced noises for a silent background.
Can I use zip ties to organize my expensive interconnects?
You should avoid using plastic zip ties on expensive interconnects because they can over-compress the cable's internal dielectric and jacket. This permanent pressure can subtly change the electrical properties of the cable and make future adjustments difficult. Soft-touch Velcro wraps or silicone ties are the preferred choice, as they provide a secure hold without damaging the artisanal construction of high-end wiring.
How much space should I leave between different types of audio cables?
I recommend leaving at least three to six inches of space between power cables and signal-bearing interconnects whenever possible. While even a small gap helps, increasing the distance significantly reduces the strength of the electromagnetic field that could interfere with your audio. If space is tight, focus on keeping them parallel for the shortest distance possible and crossing them only at 90-degree angles.
Is it okay to coil excess cable length if it is too long?
It is not advisable to tightly coil excess cable length, as this can create an unintended induction coil that introduces noise or heat. Instead, use the "loop and tuck" method by allowing the extra length to hang in a wide, relaxed arc behind the equipment. This keeps the conductors in a natural state and prevents the electrical issues associated with tight, circular coiling.